I. Import the Source Server
Log in to your source server and run the migration command below with administrator privileges.
Follow these steps:
1. Log in to the source server.
2. Copy the migration command provided on this page and execute it as the root user.
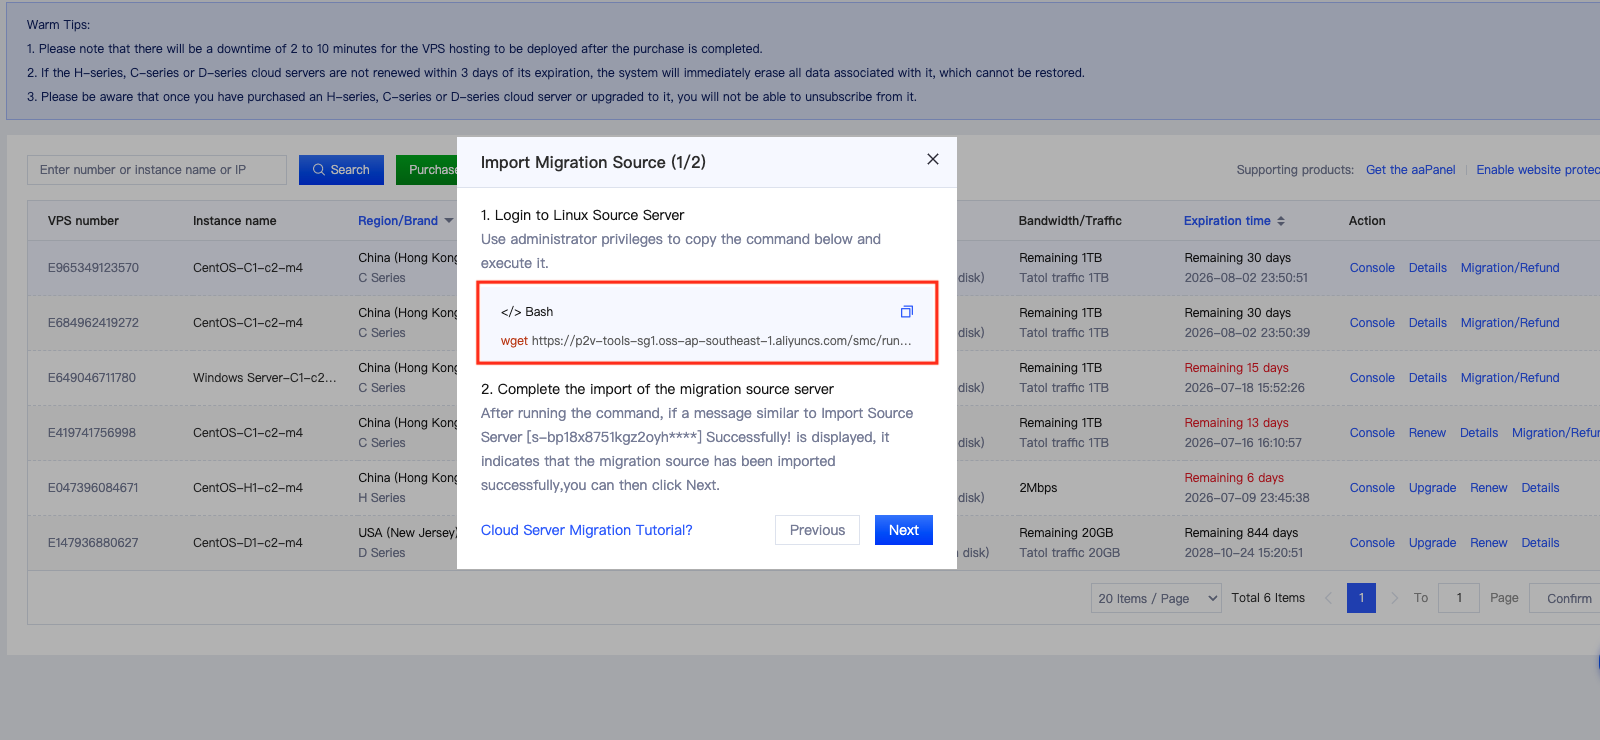
3. Paste the command into your server terminal and run it.
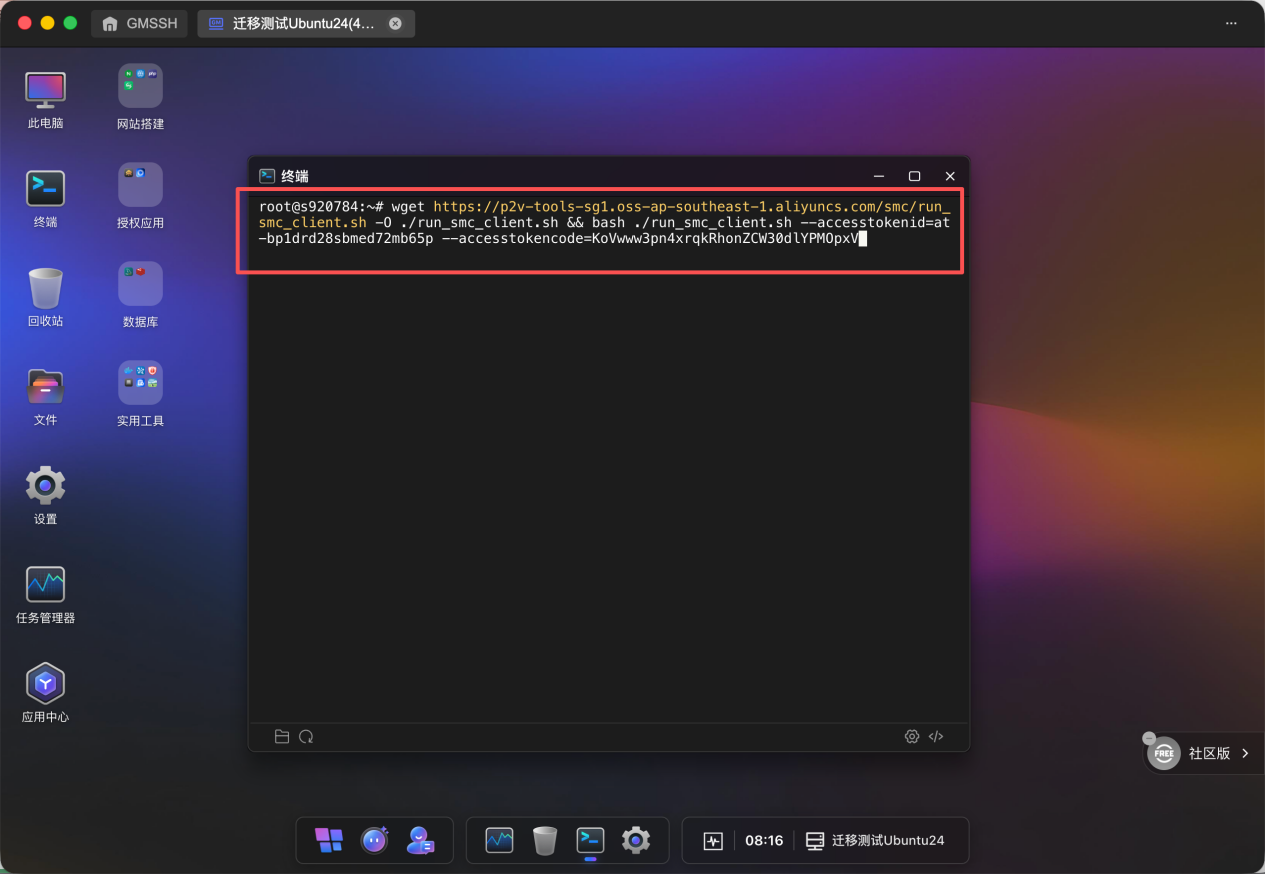
4. Wait for the command to complete and review the output.
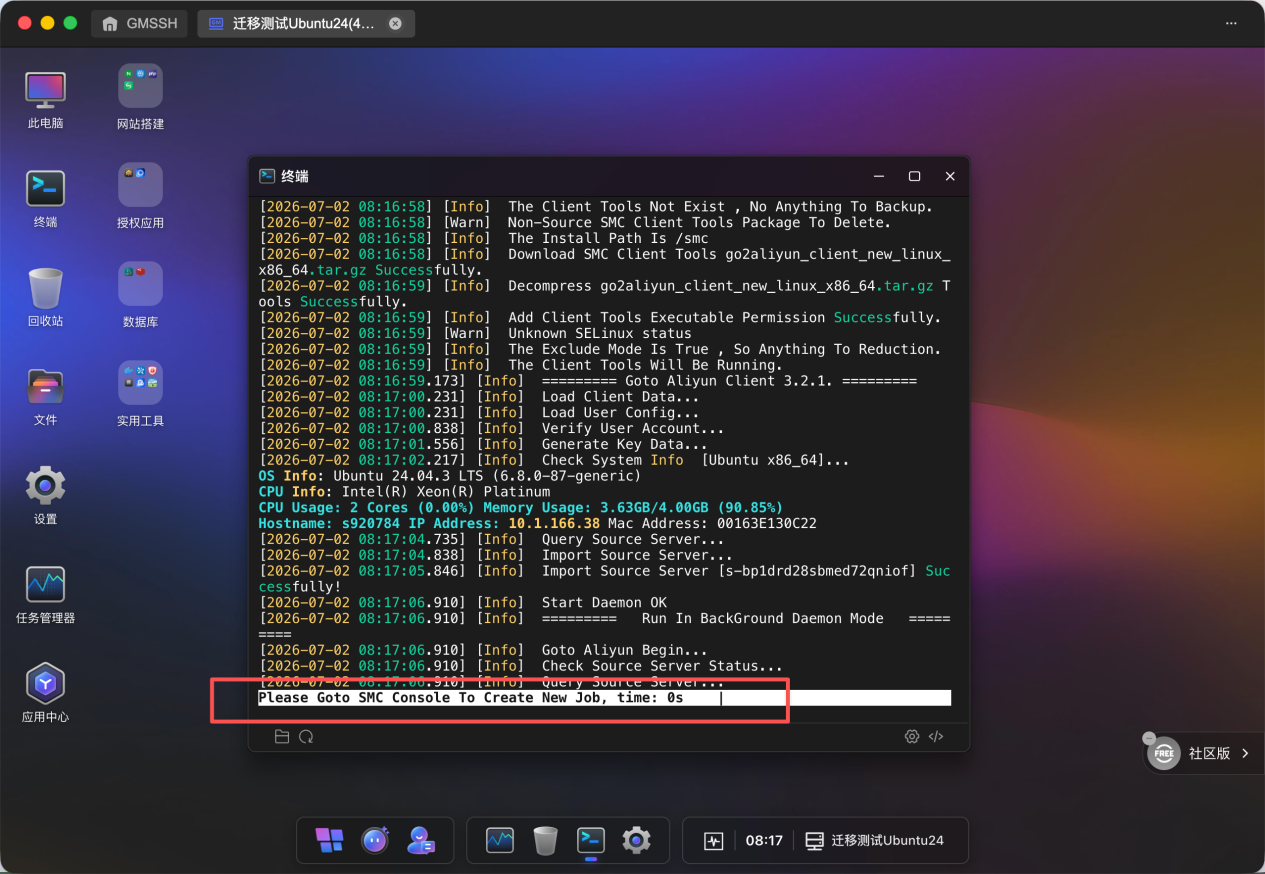
If the command completes successfully and you see a message similar to "Please Goto SMC Console To Create New Job, time: 0s", the source server has been imported successfully. You can now proceed to the next step.
Once the source server has been imported successfully, click Next to continue.
II. Obtain the Hostname and Private IP Address
Retrieve the source server's hostname and private IP address, then enter them into the corresponding fields.
Follow these steps:
1. Open a new terminal session on the source server.
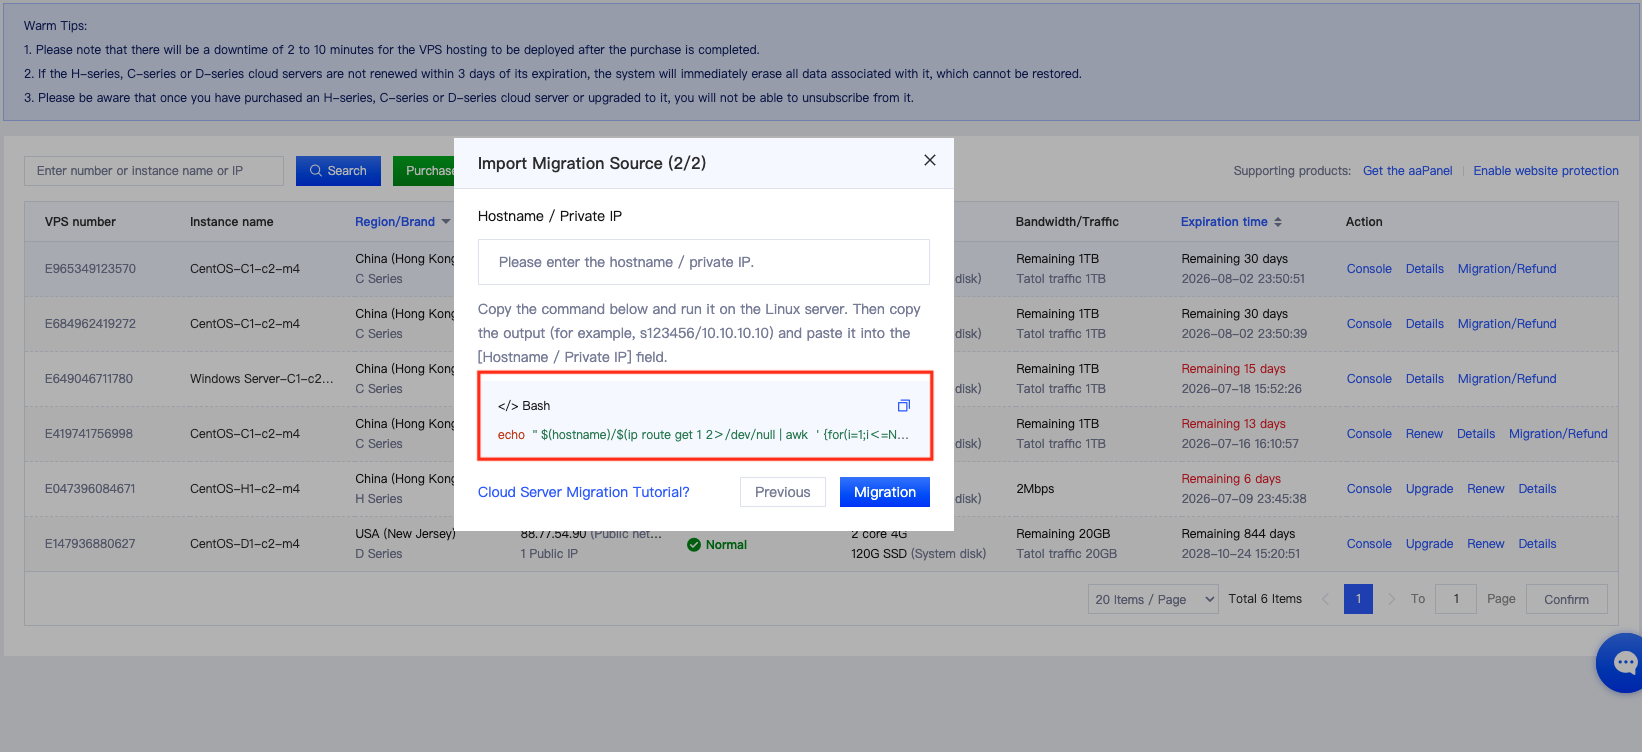
2. Copy the second command provided on this page.
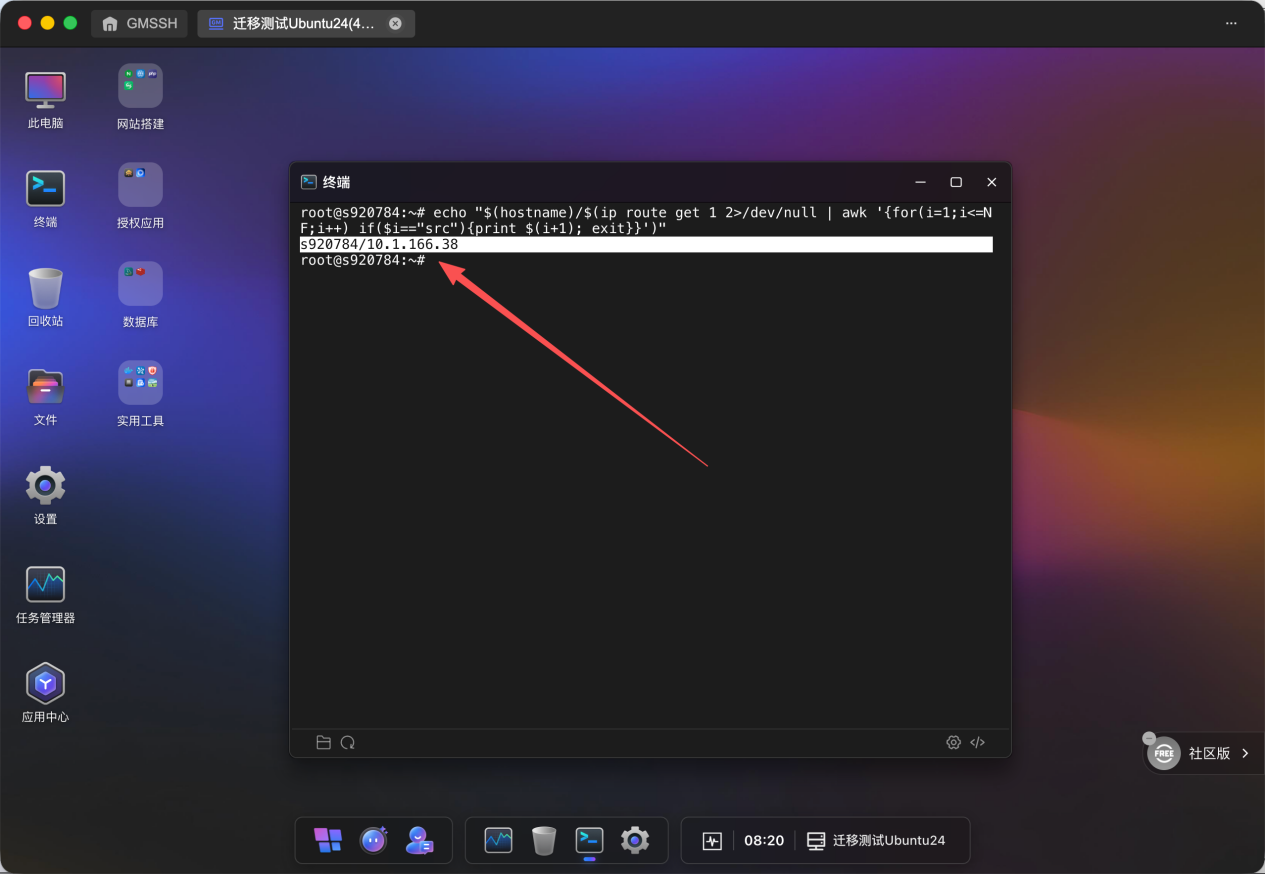
3. Paste the command into the server terminal and run it, as shown below.
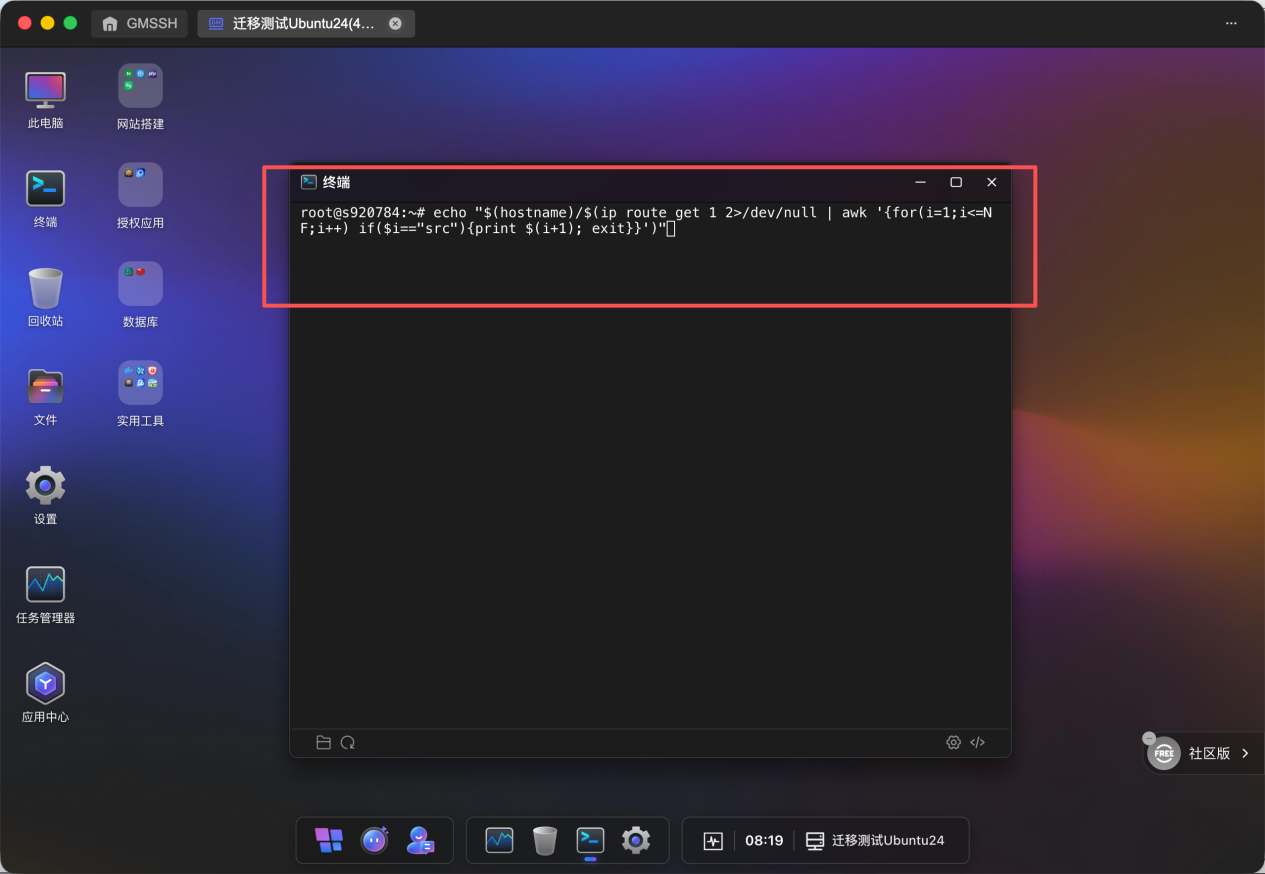
4. When the command completes, you'll see output similar to localhost/12.34.56.78, as shown below. The hostname appears before the slash (/), and the private IP address appears after it.
5. Copy the complete output (hostname/private IP address) and paste it into the Hostname / Private IP Address field on the migration page.
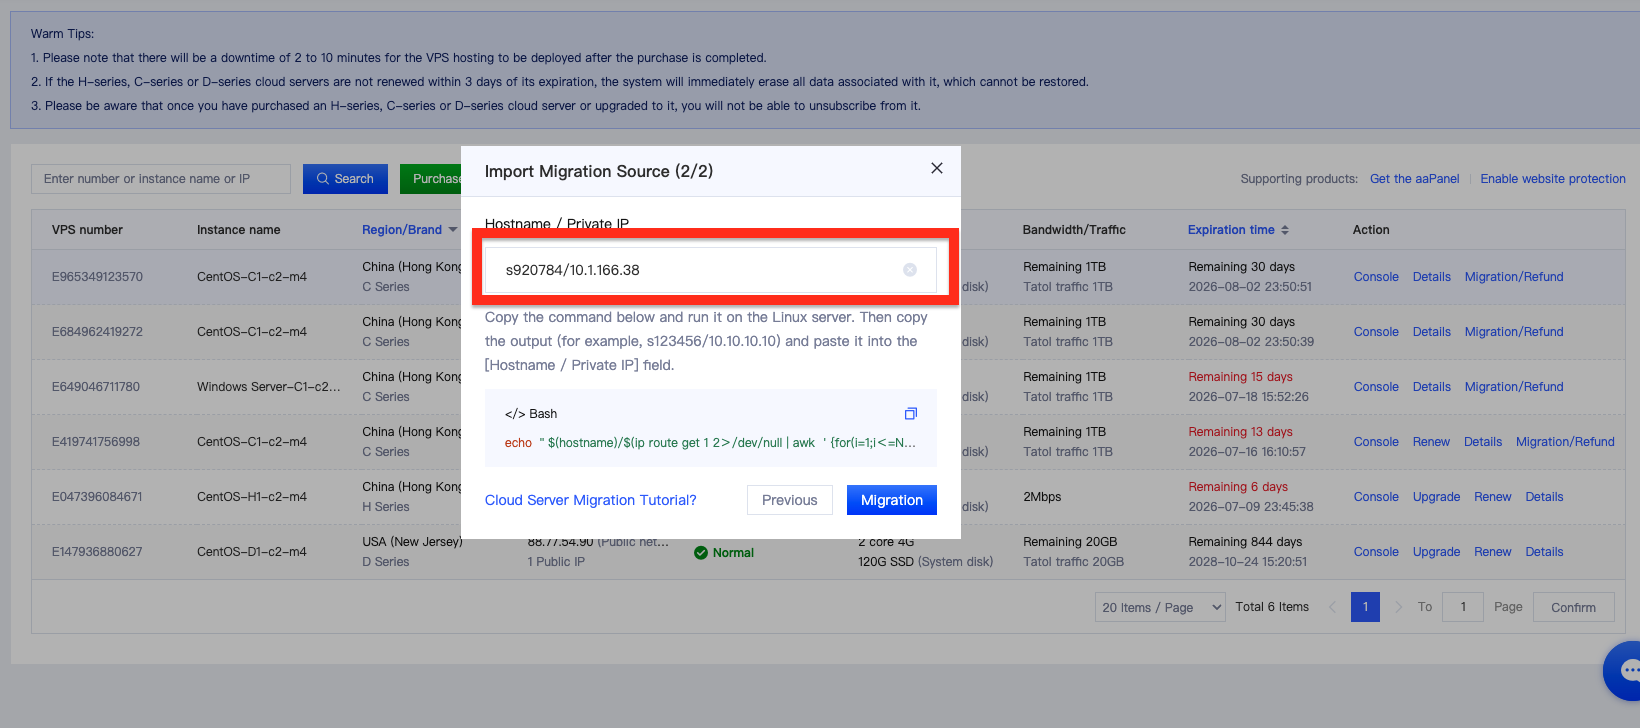
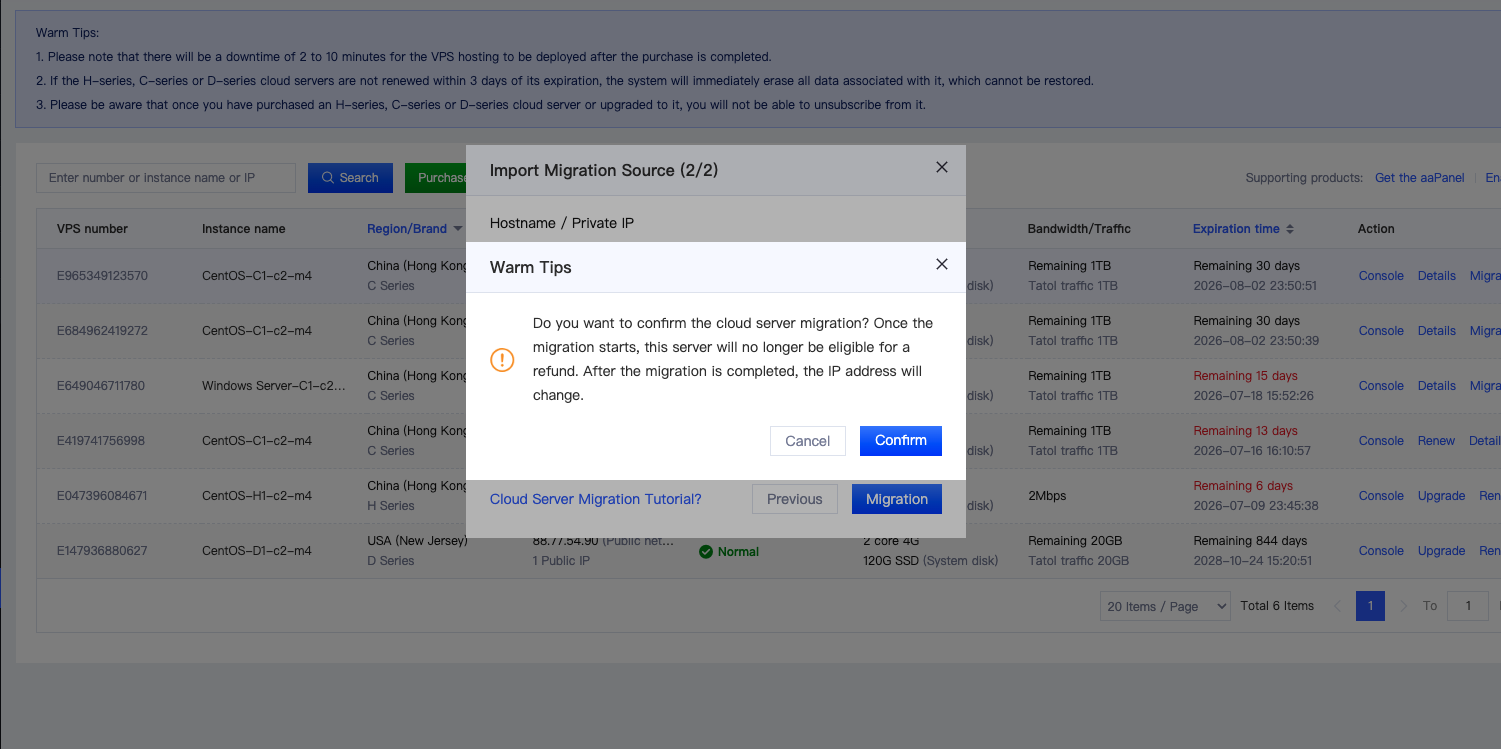
6. After verifying that the information is correct, click Start Migration. A confirmation dialog will appear. Review the information carefully, then click Confirm Migration to begin the migration process.
III. Wait for the Migration to Complete
Once the migration is complete, a new A Series cloud server will appear in your server list, and the original C Series server will be automatically released.
1. In-App Notification: You'll receive an in-app notification confirming that the migration was completed successfully. The notification includes details of both the original server and the new server.
2. Email Notification: You'll receive a confirmation email at your registered email address. The email contains the same information as the in-app notification.
IV. Post-Migration Tasks
After receiving the migration completion notification, complete the following tasks:
1. Update your DNS records.
Point your domain to the new server's public IP address.
2. Update any IP-dependent configurations.
Review and update any applications, services, or systems that reference the old server's IP address.
3. Log in to the new server.
Verify that all data has been migrated successfully.
4. Verify your website and services.
Make sure your website, applications, and related services are running and accessible.
5. Reset the server password and reboot the server.
Reset the server password, then restart the server to ensure the new credentials take effect.
V. Important Notes
1. Keep the source server running throughout the migration.
Do not shut down or restart the server until the migration is complete.
2. Data created during the migration may not be synchronized.
To avoid data inconsistency, we recommend stopping all write operations before starting the migration.
3. The original C Series server will be permanently released after a successful migration and cannot be recovered.
Make sure all data has been migrated successfully before completing the migration.
4. The server's public IP address will change after the migration.
Be sure to update all DNS records, applications, and services that reference the old IP address.
Need help?
If the migration fails or you encounter any issues, please contact our customer support team or submit a support ticket for assistance.